import React, { useState } from 'react';
import styled from 'styled-components';
function CustomRadio() {
const fruits = [
{text: '복숭아', value: 0},
{text: '레몬', value: 1},
{text: '사과', value: 2},
]
const [selectedFruit, setSelectedFruit] = useState(null);
const onChangeRadio = (e) => {
setSelectedFruit(Number(e.target.value));
}
return (
<RadioWrap>
{
fruits.map((fruit, idx) => (
<label key={idx}>
<input
type='radio'
name='fruits'
value={fruit.value}
onChange={onChangeRadio}
checked={idx === selectedFruit}
/>
<span className='fruit'
style={{
border: idx === selectedFruit ? '1px solid pink' : '1px solid lightgray',
backgroundColor: idx === selectedFruit ? 'pink' : 'lightgray'
}}
>
{fruit.text}
</span>
</label>
))
}
</RadioWrap>
);
}
export default CustomRadio;
const RadioWrap = styled.div`
display: flex;
flex-direction: row;
justify-content: center;
margin-top: 30px;
input {
border: 0;
clip: rect(0 0 0 0);
height: 1px;
margin: -1px;
overflow: hidden;
padding: 0;
position: absolute;
width: 1px;
}
.fruit {
border: 1px solid red;
height: 30px;
line-height: 30px;
border-radius: 5px;
font-size: 14px;
background-color: #FAFAFA;
margin: 4px;
text-align: center;
padding: 4px 16px;
}
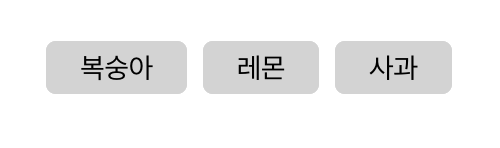
`라디오 버튼은 하나만 선택할 수 있다.
먼저 fruits라는 배열을 만들고 안에 객체를 넣어주었다.
객체 안에는 해당 과일을 나타낼 'text'와 체크 시 비교할 'value' 값을 주었다.
onChange 속성에는 useState를 사용하여 선택한 과일의 value 값을 selectedFruit에 넣어주었고,
체크 상태를 알려주는 checked 속성은 인덱스 값과 선택된 과일의 value 값(selectedFruit)을 비교하여 넣어주었다.
기본 라디오 버튼 대신 커스텀하기 위해 input은 css를 사용하여 숨겨주었으며,
span 태그를 버튼 형식으로 만들어 선택된 과일 버튼의 색을 변경해주었다.
이때 input checked 속성에서 idx와 selectedFruit 값을 비교한 것처럼
삼 항 연산자를 사용해서 span의 스타일을 바꿔주었다.
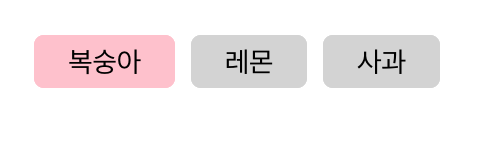
복숭아를 클릭하면 onChangeRadio 함수에 의해 selectedFruit 값이 0이 되어서
map을 사용해 버튼이 만들어질 때 주어진 인덱스 값과 비교하여
첫 번째에 있는 복숭아가 분홍색으로 잘 채워지고, 나머지는 회색으로 채워진 것을 확인할 수 있다.
'Web > React' 카테고리의 다른 글
| [React] useRef (실제 DOM 접근) (0) | 2022.12.23 |
|---|---|
| [React] useRef (useState와 비교) (0) | 2022.12.21 |
| [React] JSX 안에서 중첩 삼 항 연산자 사용하기 (0) | 2022.11.17 |
| [React] Nested Routes (0) | 2022.10.13 |
| [React] useState 동기적 처리 (0) | 2022.07.16 |